What to look for
What good teacher planner examples actually show you
Search for teacher planner examples and you mostly get two things: photos of pretty covers, and lists of eleven sections to put in a binder. Neither answers the question you actually have, which is what a page looks like once a real week is written on it, and whether that layout would survive your timetable.
So this post does it the other way round. Below are four pages from our Digital Teacher Planner, filled in with sample entries we wrote to look like an ordinary week in June. The names and grades are invented; the layouts are exactly what ships. For each one we say what it holds, when you open it, and what to borrow even if you never use our file.
One thing to notice before the pages: every one of them carries the same row of tabs across the top (Index, Plan, Lessons, Grades, Seating, Contacts) and a Back to home button. That is not decoration. A planner you cannot move around in four minutes between classes is a planner you stop opening.
Example one
A weekly plan built on periods, not hours
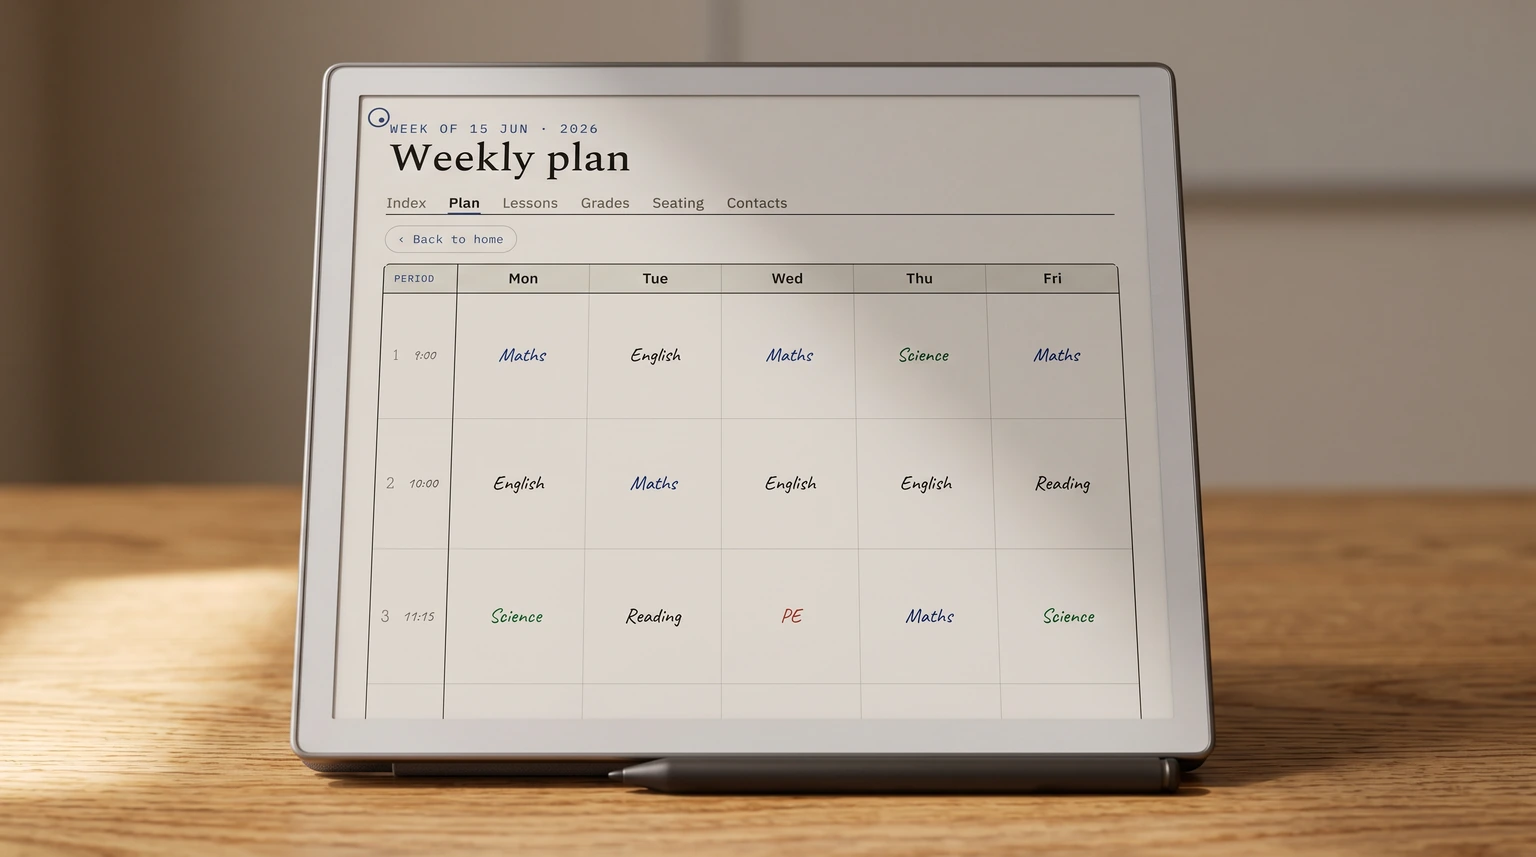
This is the page you open most, so it is the one worth getting right. Down the left side sit six periods, each with its start time: 9:00, 10:00, 11:15, lunch at 12:00, then 1:30 and 2:30. Across the top run Monday to Friday. Each cell holds one word, the subject, and nothing else.
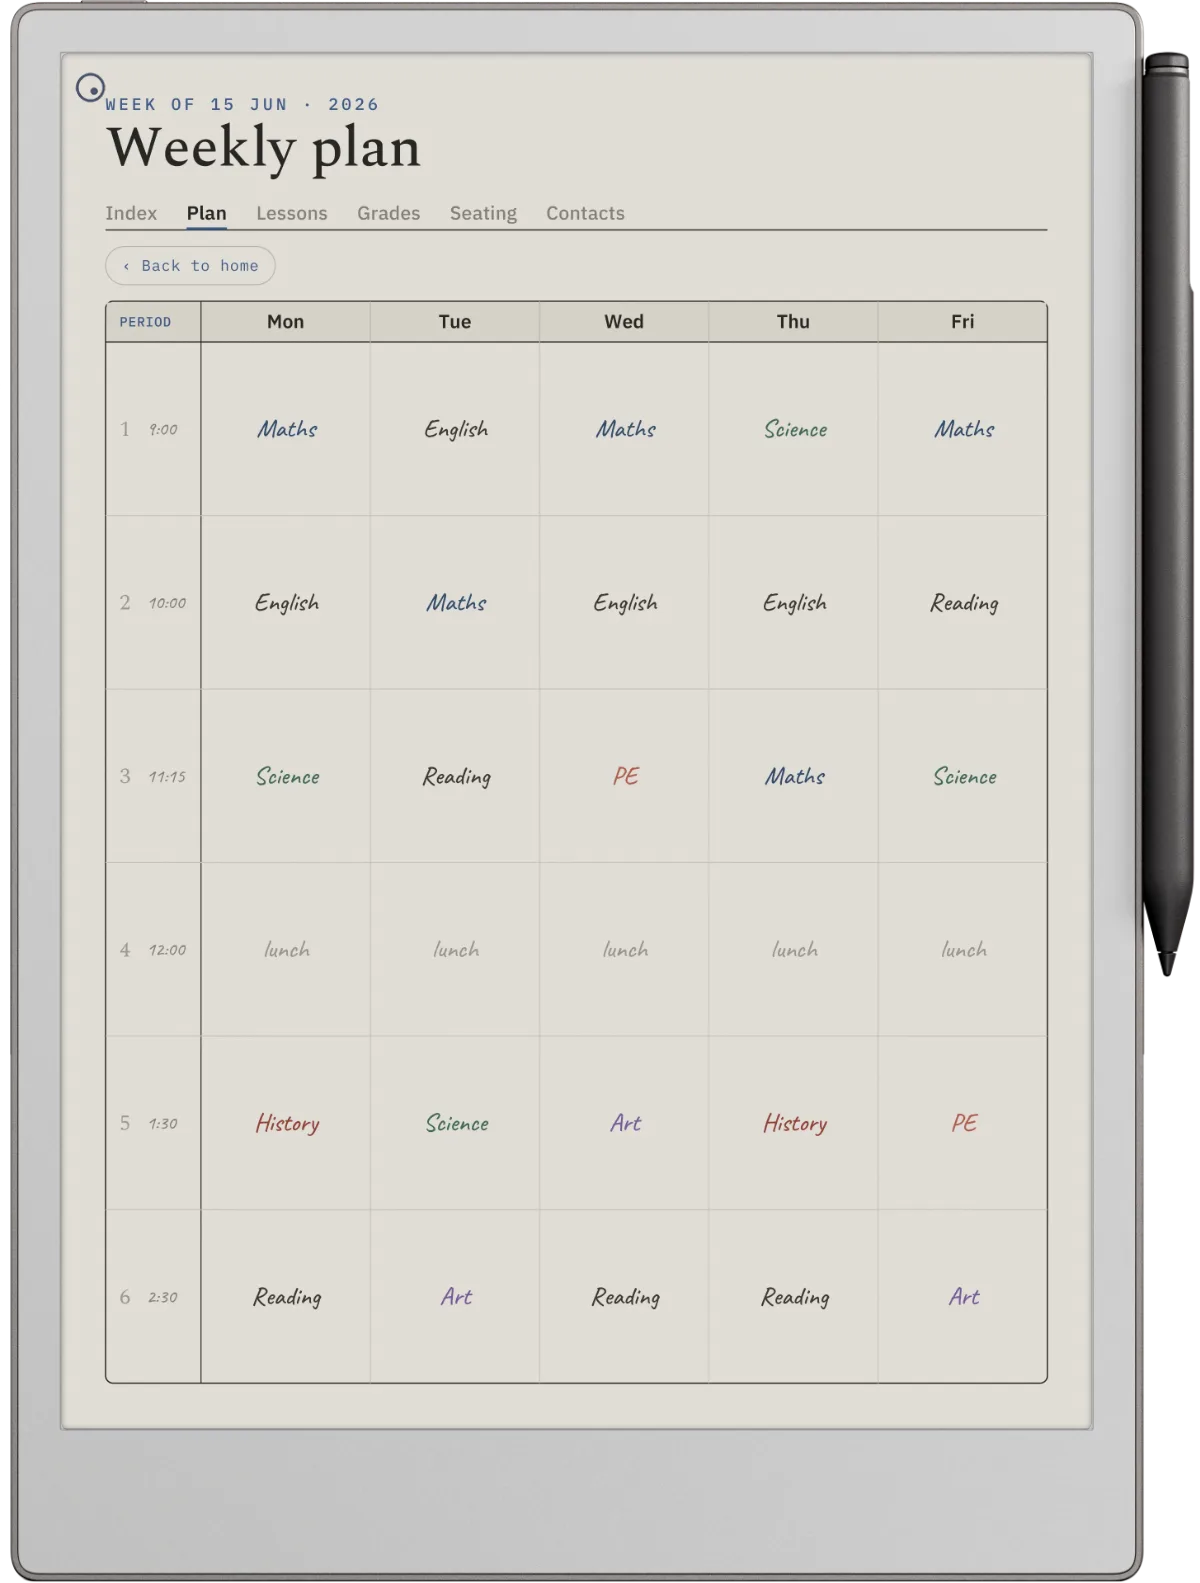
That restraint is the lesson. A weekly page that tries to hold the lesson content too ends up with cramped handwriting nobody can read by Wednesday. Keep the week as a map of where you are when, and put the detail one tap away on the lesson page. If your school runs a block or rotating schedule, the same idea holds: rows for the blocks you actually have, not for clock hours.
Example two
One page per lesson, with the outcome written first
The second example is a single lesson: a fractions lesson on a Monday, adding fractions with the same denominator. The page is split into five boxes. At the top, the date and the unit or topic. Then learning objectives, written as three short checkable lines. Beside them, the outline of activities in the order you teach them: a hook, modelling with fraction strips, guided practice on mini whiteboards, independent practice, an exit ticket, and a review.
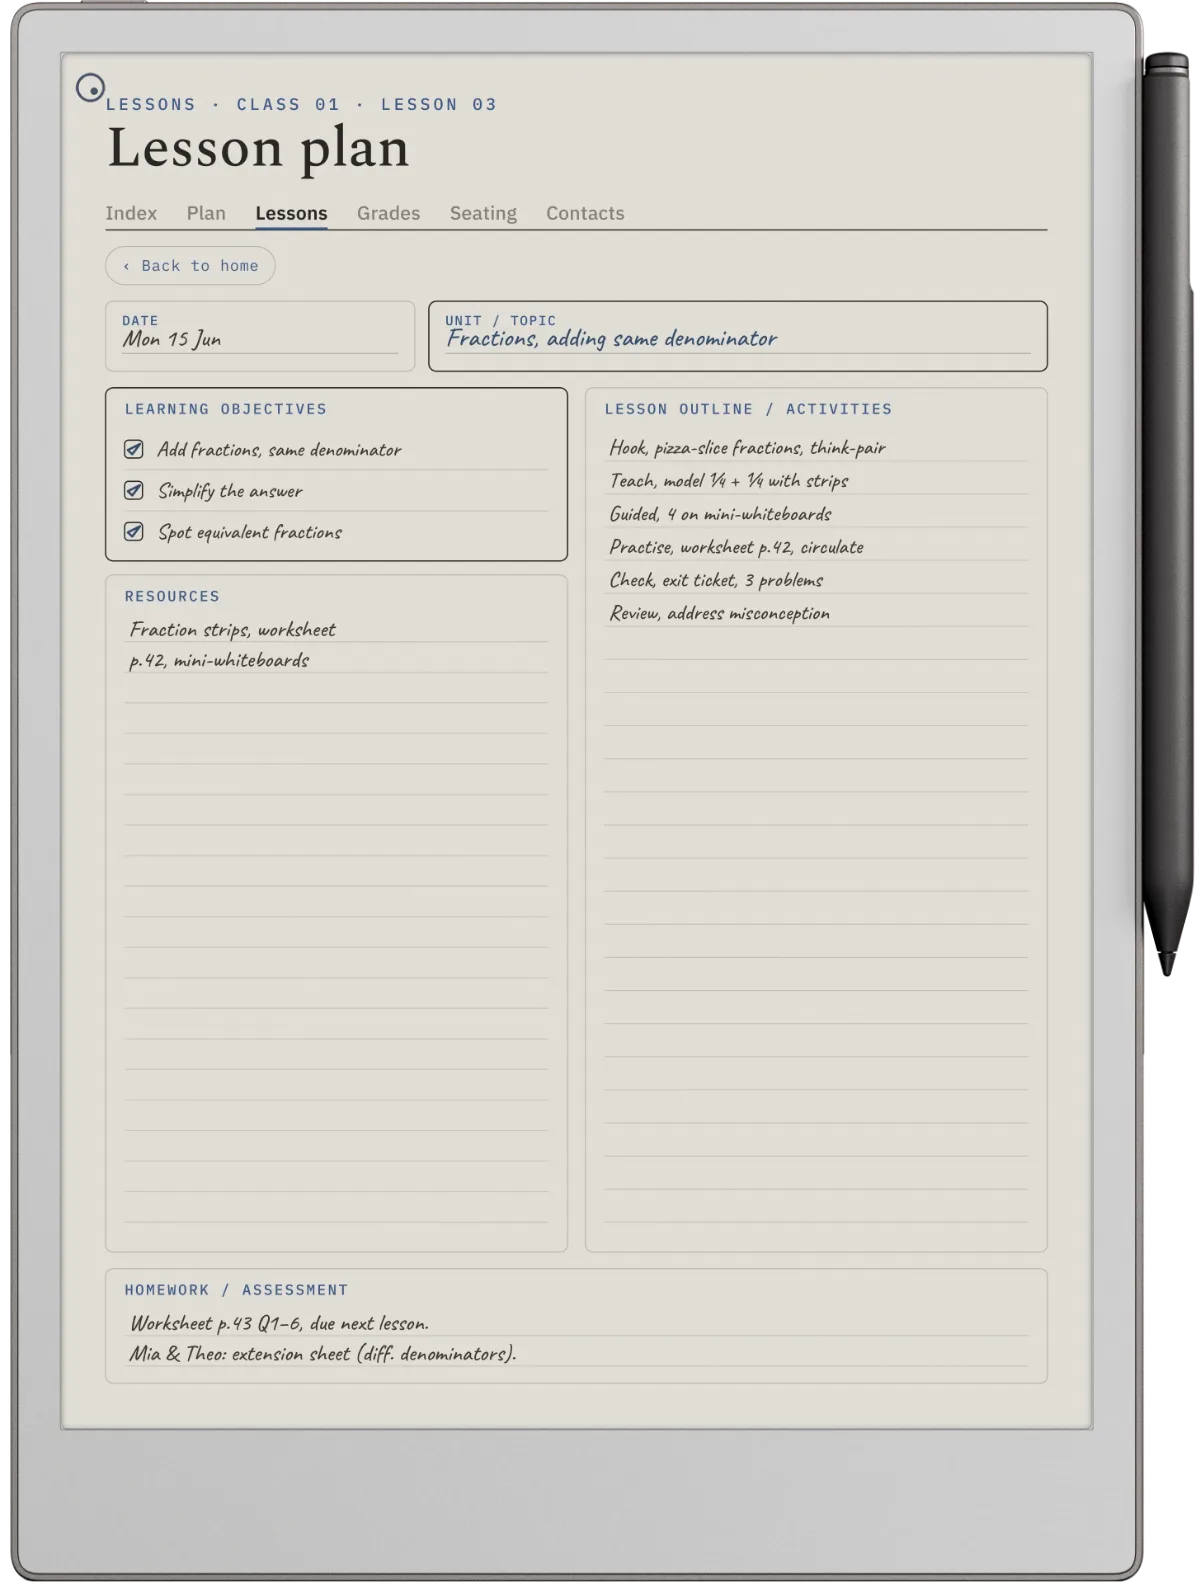
Under that, a resources box (fraction strips, the worksheet page, the whiteboards) and at the bottom a homework and assessment line, including which two students get the extension sheet. The objectives come before the activities on purpose. If you cannot write the three things students should be able to do by the bell, the outline is not ready yet, however full it looks.
Example three
A seating chart that remembers why each student sits there
Most seating chart examples are a grid of names. This one is a grid of names with a reason under each. Twenty-four desks in four rows of six, the front whiteboard marked along the bottom, and in each desk a first name plus a few words: front row for a hearing aid, a reading buddy, keep apart from another student, left handed so end of the row, new on 12 June.
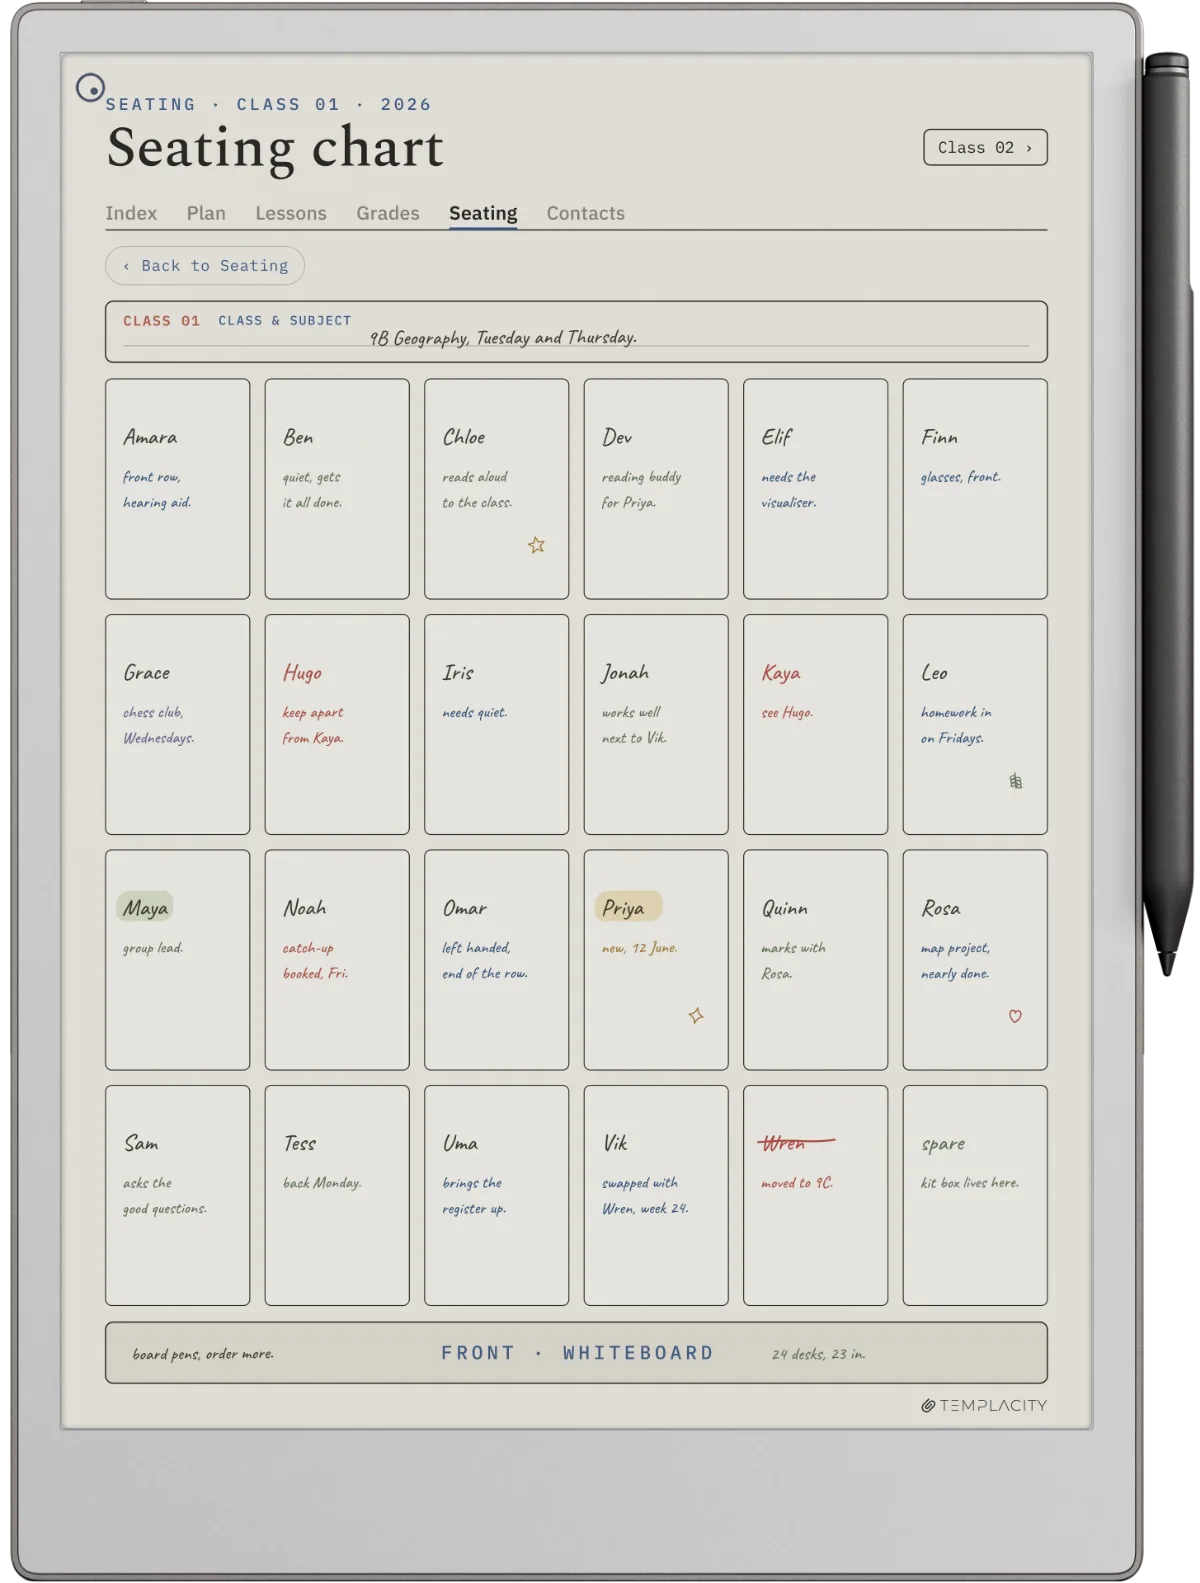
Those notes are what a substitute needs and what you forget by March. When a student moves, the example shows the honest way to record it: the old name struck through with a note of where they went, rather than a fresh chart that loses the history. A Class 02 button in the corner jumps to the next class, which matters the moment you teach more than one group in a room.
Example four
The gradebook and the parent contact log
The last two teacher planner pages are the ones people skip setting up and then wish they had. The gradebook is a roster down the side with one column per assessment date and an average column at the end, with low scores written in red so a pattern jumps out without doing any sums. It is a working record for you, not a replacement for the school’s own system.
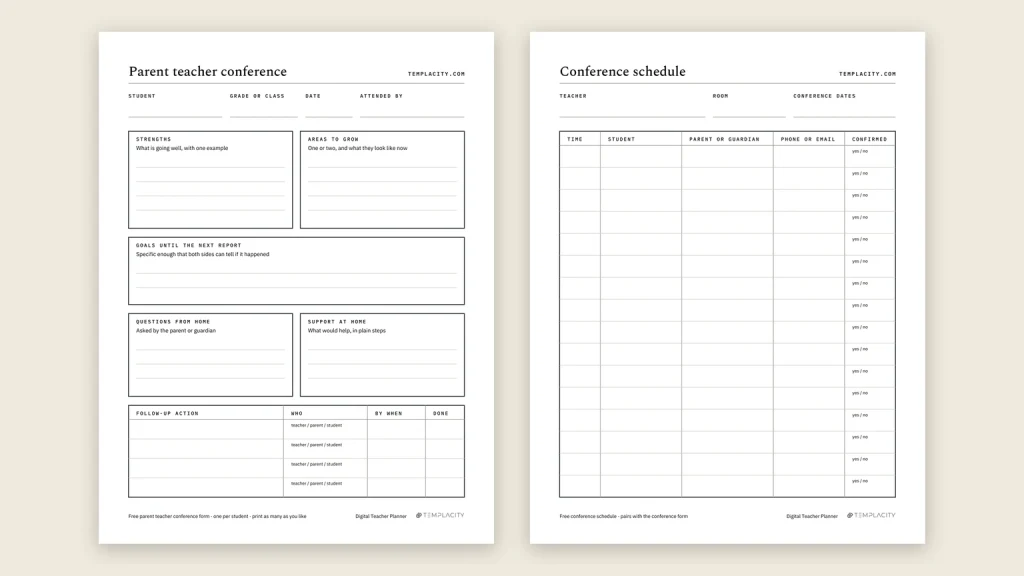
The parent contact log is simpler and, in practice, more valuable. Five columns: the date, the student and which family member, how you spoke (a call, an email, in person), the reason and the outcome in one line, and a follow-up checkbox. When a question comes up at a conference about what was said in October, this is the page that answers it. For the conference itself, our free parent teacher conference form covers the meeting from preparation to follow-up.
| Holdswhat goes on it | Open itwhen | Copy thiseven without our file | |
|---|---|---|---|
| Weekly plan | Subject per period, Monday to Friday | Every morning | One word per cell |
| Lesson plan | Objectives, activities, resources, homework | The night before | Objectives first |
| Seating chart | Name plus a reason per desk | New term, new student, sub day | Strike through, never redraw |
| Gradebook | Scores by assessment date, average | After marking | Low scores in a second colour |
| Parent contact log | Date, family, channel, reason, follow-up | Straight after every contact | A follow-up checkbox |
By role
Teacher planner examples by the way you teach
The four pages stay the same across roles. What changes is the weekly plan, because the week is where timetables differ.
Elementary, one class all day. Periods down the side, subjects in the cells, exactly like the example above. You plan by subject, so the lesson pages pile up fastest here; keep them filed by subject rather than by date and next year’s reuse gets much easier.
Secondary, several classes in one subject. Swap the subject in each cell for the class name, 9B or 10A, because every cell is the same subject. Your seating charts multiply instead, one per class, which is why the jump between classes matters more to you than to anyone.
Specialists and part-time staff. Music, PE, art, or two days a week: most of your grid is empty, and that is fine. Cross out the periods you do not teach once, at the start of term, so the page shows only your real week.
Keep the week as a map and the lesson as the detail.Example two
Leave it out
What to leave out of a teacher planner
The longest examples are the ones most likely to be abandoned. A planner with a section for standards, pacing guides, every meeting and a to-do list is a full binder by September and an unopened one by November. Start with the four pages above, and add a section only when you notice you are writing the same thing on sticky notes somewhere else.
Some things should stay out on purpose. Detailed records about individual students, such as support plans or medical information, usually belong in the school’s own systems, so check your school’s data policy before copying them into a personal planner or onto a personal device. Our guide to what a digital teacher planner replaces goes through what to keep in the school’s tools and what a planner does better.
If you are still choosing a format rather than a layout, paper, software or a tablet, our best teacher planner comparison ranks them on the three tests that decide whether a planner makes it to June.
FAQ
Common questions, answered briefly
What should be in a teacher planner?
How do you lay out a weekly teacher planner page?
Are these real teacher planner pages?
Should student information go in a personal teacher planner?
If yours isn’t above, drop the question in the comments and we’ll add it.
People also ask
Other questions, briefly answered
If your planner has a page that earns its place and is not on this list, tell us in the comments what it holds and when you open it. The best examples here came from exactly that kind of question.