Kindle Scribe OneNote Integration: Ultimate Sync Guide
Kindle Scribe OneNote Integration: Ultimate Sync Guide Productivity & Tech Mastering Your Kindle Scribe OneNote Integration Workflow For professionals who live in the Microsoft ecosystem,
Canvas Size
1860 x 2480 px
Export Standard
Flattened PDF
Installation
Send to Kindle API
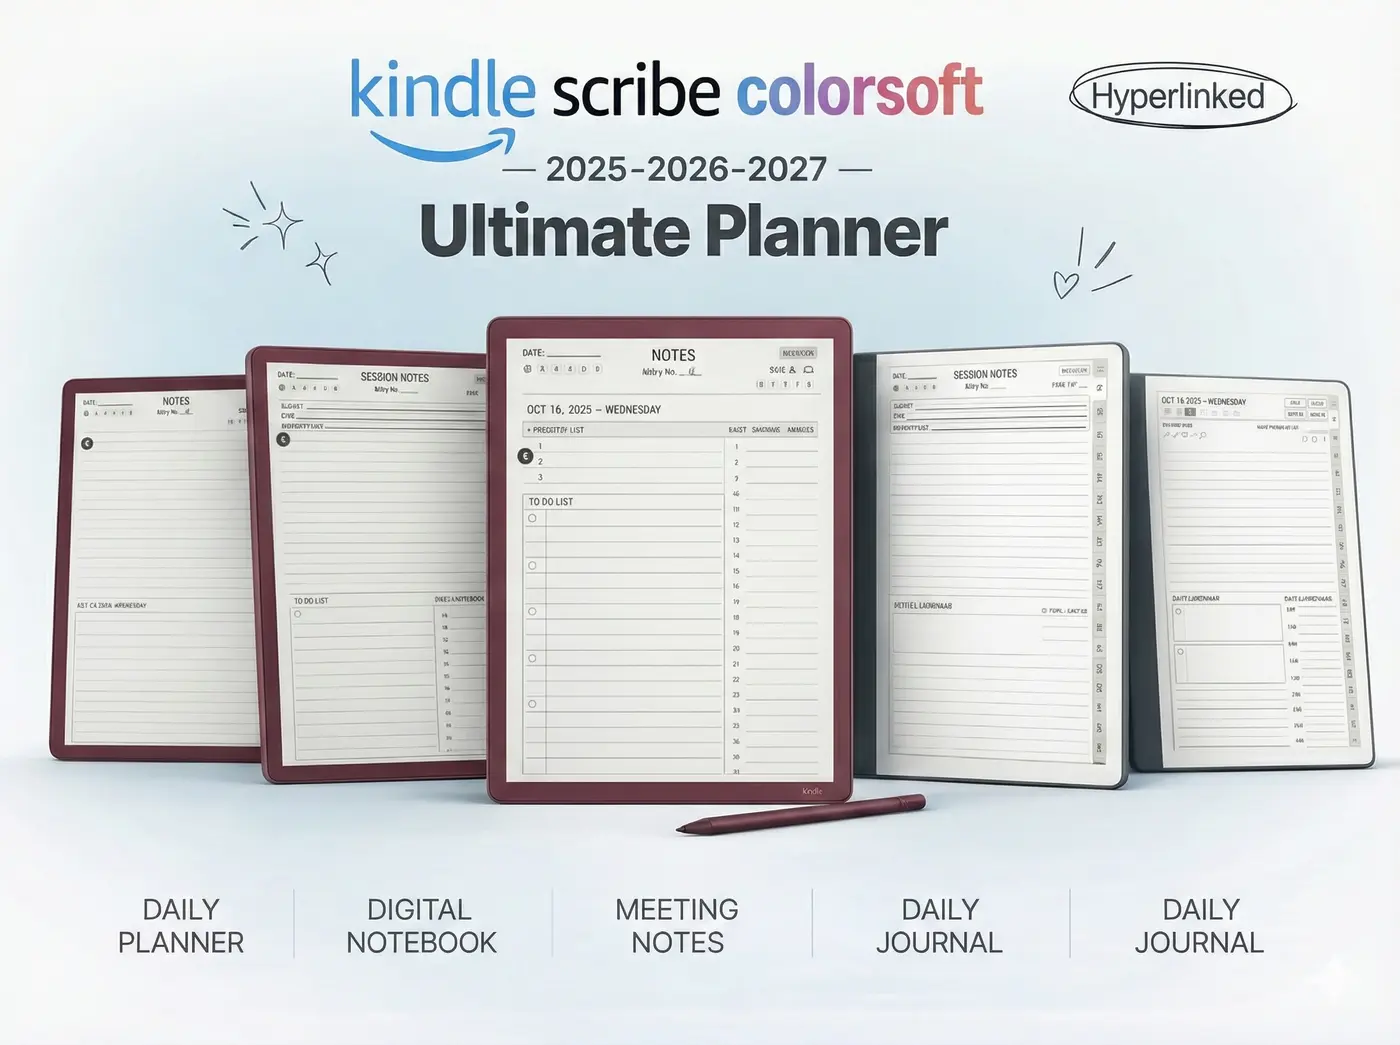
While the native notebooks provided by Amazon are functional for basic journaling, professionals quickly realize that relying on simple lined paper severely throttles their productivity. Learning exactly how to make kindle scribe templates is the ultimate unlock for your e-ink hardware. By designing bespoke digital frameworks, you transition your tablet from a passive piece of digital glass into a highly structured, interactive command center.
In this comprehensive, 1,500-word technical deep dive, we will dissect the anatomy of the perfect digital planner. We will explore the rigorous resolution requirements necessary to prevent pixelation, the architectural logic behind hyperlinking hundreds of pages, and the specific cloud-upload pipeline required to ensure your stylus actually works on the file. Whether you are an academic crafting the perfect Cornell note system or a project manager building agile Kanban boards, mastering how to make kindle scribe templates gives you total ownership over your 2026 digital workflow.
Technical Deep Dive: The foundation of learning how to make kindle scribe templates begins with pixel geometry. The tablet features a 10.2-inch E Ink Carta 1200 display running at a dense 300 pixels per inch (PPI). To achieve edge-to-edge sharpness without blurry aliasing, your design canvas must be set to exactly 1860 x 2480 pixels. If you use a standard A4 or US Letter dimension, the Kindle’s software will aggressively rescale the PDF upon import, resulting in fuzzy text and jagged grid lines that ruin the premium reading experience.
Workflow Application: Before opening Canva, Adobe Illustrator, or Figma, lock in your custom canvas dimensions. This 3:4 aspect ratio perfectly matches the physical bezel of the screen. A pixel-perfect approach ensures that when you zoom in on your handwritten meeting minutes, the underlying template grid remains razor-sharp, reducing cognitive strain and eye fatigue during long, demanding workdays.
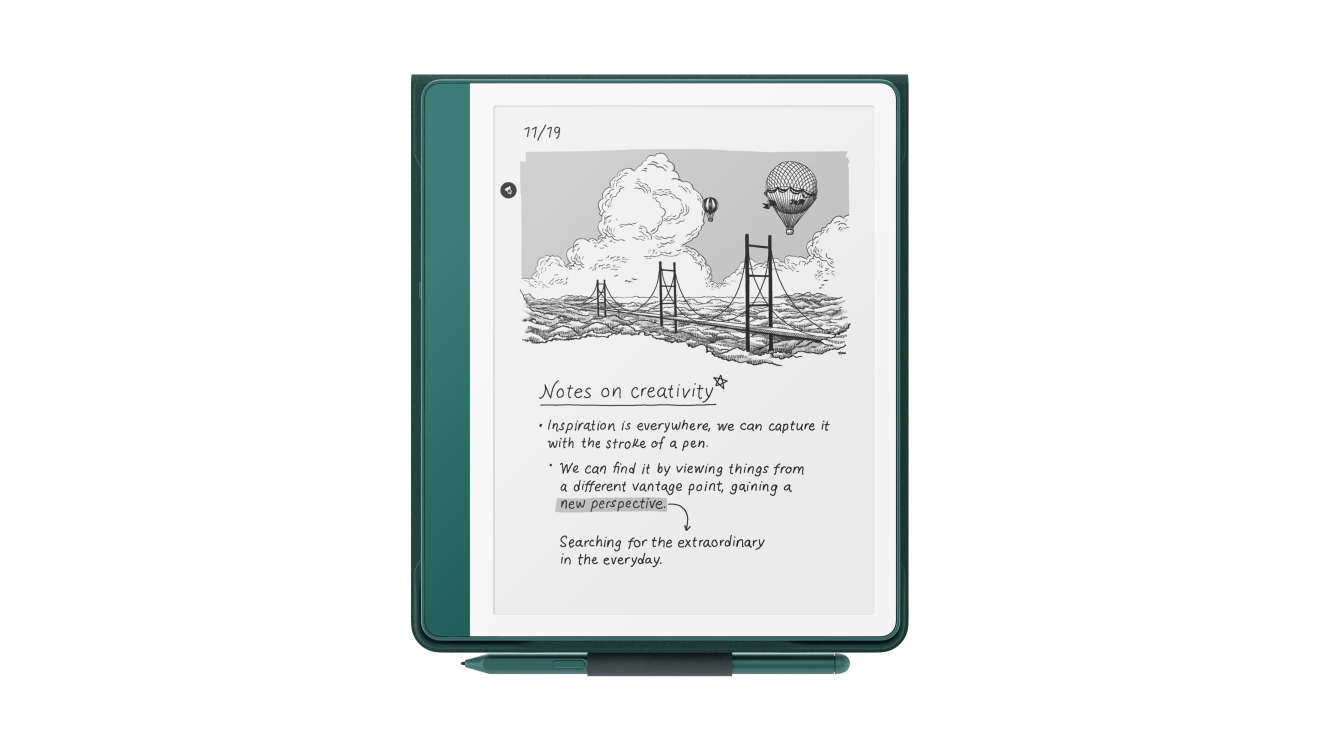
Technical Deep Dive: E-ink screens do not emit light natively; they reflect ambient light off physical microcapsules containing charged black and white pigments. Therefore, how to make kindle scribe templates correctly involves mastering high-contrast grayscale. Subtle drop shadows, light pastels, and gradients that look beautiful on an OLED monitor will render as muddy, indistinguishable gray smudges on an e-ink display.
Workflow Application: Stick to absolute hex codes. Use pure black (`#000000`) for primary headers and borders. For background grids, dots, or writing lines, use a medium-light gray (`#CCCCCC` or `#D1D1D6`). This ensures the structural lines guide your eye without competing visually against the stark black digital ink laid down by the Premium Pen. The template should be the quiet infrastructure, allowing your handwritten thoughts to dominate the page.
Technical Deep Dive: Unlike physical paper, digital screens overlay user interfaces on top of your documents. The Scribe features a floating pen toolbar that can be docked on the left or right margin. A critical rule of how to make kindle scribe templates is establishing “Safe Zones.” If you place a functional hyperlink or a critical task box within 40 pixels of the screen’s vertical edges, the toolbar will cover it, rendering that part of your planner entirely inaccessible without constantly minimizing the UI.
Workflow Application: Apply a strict 40-pixel internal margin around your entire design canvas. Treat this perimeter as “dead space.” Do not place month tabs or clickable indexes here. This margin also provides a comfortable visual breathing room, mimicking the natural borders of a traditional, physical notebook, which enhances the overall ergonomic feel of the digital planner.
Technical Deep Dive: A static PDF is just a picture, but a hyperlinked PDF is a fully interactive software environment. When studying how to make kindle scribe templates, you must understand XML link structures. Design software like InDesign or Keynote allows you to draw invisible bounding boxes over text (like a “January” tab) and instruct the PDF code to jump to page 32 when that box is tapped. The Kindle’s processor parses these internal links in milliseconds.
Workflow Application: Create a “Master Index” or “Dashboard” on page one of your template. From this central hub, build buttons that link out to your daily planner, your habit tracker, and your financial ledgers. This non-linear navigation is the single greatest advantage of a digital system, allowing you to instantly jump between vastly different mental contexts without manually swiping through hundreds of pages.
Technical Deep Dive: The Scribe utilizes a capacitive touch layer separate from the Wacom digitizer. Because fingers are imprecise instruments compared to styluses, tap targets must be adequately sized. If your hyperlinked tabs are too small or clustered too tightly together, the device will misinterpret your tap, sending you to the wrong month or completely ignoring the input.
Workflow Application: A fundamental rule of how to make kindle scribe templates is ensuring every clickable button is at least 44×44 pixels wide. Place monthly navigation tabs down the right-hand side of the page, spaced evenly. This allows right-handed users to easily tap through the year with their thumb while maintaining their grip on the stylus, keeping the workflow seamless and ergonomic.
Technical Deep Dive: A comprehensive, year-long daily planner can contain over 1,000 pages and 50,000 internal hyperlinks. If the PDF is bloated with high-resolution raster images instead of scalable vector graphics, the file size will skyrocket. When the file exceeds 50MB, the Kindle’s limited RAM struggles to hold the entire link map in active memory, resulting in sluggish page turns and “Wait” loading icons.
Workflow Application: Keep your files lean. Never use imported JPEG images as backgrounds when learning how to make kindle scribe templates. Construct your lines and tables natively within your design software so they export as lightweight vector data. A well-optimized 400-page planner should remain under 10MB, guaranteeing that your device responds with lightning-fast agility during high-pressure meetings.
Designing the file is only half the battle. Knowing how to make kindle scribe templates requires mastering the specific Amazon upload pipeline to ensure the stylus actually writes on your new PDF.
Technical Deep Dive: The most frequent point of failure when learning how to make kindle scribe templates is the “grayed-out pen” error. This occurs because the Scribe’s operating system strictly separates reading documents (EPUBs/Basic PDFs) from writable documents. Sideloading a PDF via USB cable bypasses Amazon’s servers. Without the server processing the file and adding the transparent “Write-On” metadata layer, the digitizer remains locked.
Workflow Application: If your pen does not work on your new template, delete the file from the tablet immediately. Return to your PC and re-upload the file using the web portal. It is an unavoidable bottleneck in the Amazon ecosystem, but understanding this routing requirement guarantees you will never be locked out of your own custom planner.
Technical Deep Dive: The tablet’s software uses a prioritized input matrix. To prevent accidental page jumps while resting your hand on the screen, the system disables PDF hyperlinks while the Pen tool is active. This is a common source of confusion for new creators testing their freshly built templates.
Workflow Application: You must develop “mode switching” muscle memory. When you want to tap a hyperlinked tab on your template, you must first tap the “Hand” icon on the floating toolbar. This disengages the digital ink and activates navigation mode. Once you reach your target page, tap the “Pen” icon to resume writing. This intentional friction protects your data integrity.
Technical Deep Dive: Canva has democratized graphic design. It is cloud-based, free to use, and allows you to input custom pixel dimensions (1860 x 2480). It handles basic hyperlinking well, allowing you to link shapes or text boxes to other pages within the same document project seamlessly.
Workflow Application: If you are just figuring out how to make kindle scribe templates, start here. Canva is perfect for creating a 30-page notebook with a hyperlinked index. You can drag and drop grid lines, add minimalist icons, and export the file in minutes. However, it struggles with massive, 500-page documents, often lagging or crashing during export.
Technical Deep Dive: Presentation software is surprisingly powerful for PDF creation. Both Apple Keynote and Microsoft PowerPoint operate on a slide-based architecture that perfectly mirrors PDF pages. Their “Slide Master” features allow you to build a background layout (like a dotted grid and a top navigation bar) that applies automatically to every new page you create.
Workflow Application: For intermediate users, Keynote is exceptional. You can build a robust, 365-day planner by leveraging duplicated slides. The internal linking interface (Command + K) is incredibly fast. For users heavily embedded in corporate environments, knowing how to leverage PowerPoint to build these tools keeps everything within familiar software ecosystems.
Technical Deep Dive: Adobe InDesign is the absolute gold standard. It is the software used by professional template creators. It utilizes “Parent Pages” for master layouts and can ingest Excel spreadsheets to automate the generation of thousands of dates and calendar grids via the “Data Merge” function. It compiles highly complex XML linking trees without generating bloated file sizes.
Workflow Application: If you intend to sell your templates or deploy them across an entire corporate division, InDesign is mandatory. The learning curve is brutal, but the output is flawless. It guarantees the absolute sharpest vector lines and the fastest hyperlinking response times available for e-ink hardware.
| Software Choice | Ease of Use | Best Suited For |
|---|---|---|
| Canva (Web) | Very Easy | Single pages, short notebooks. |
| Apple Keynote | Moderate | Intermediate planners, rapid linking. |
| Adobe InDesign | Expert / Hard | Massive, 1,000+ page databased planners. |
Technical Deep Dive: Once you fill your custom templates with brilliant ideas, that data is trapped. Amazon’s export process involves using the “Share” button, which triggers the server to permanently “flatten” your vector handwriting onto the PDF layer. This creates a standard document that can be viewed on any PC, but the handwriting is no longer editable.
Workflow Application: Implement a strict Friday backup routine. Export your weekly planner pages and email them to yourself. If you are comparing your options, read our analysis on Kindle Scribe Onenote Integration 2025 to see how to funnel these flattened PDFs directly into a searchable corporate database for long-term storage.
Technical Deep Dive: The landscape of how to make kindle scribe templates is shifting rapidly with the introduction of color devices. If you are designing for the Kaleido 3 display, you must account for color rendering at 150 PPI. Using overly saturated primary colors will look grainy. Instead, professional designs utilize soft pastels (light blues, muted greens) to create visual hierarchy without triggering pixelation artifacts.
Workflow Application: If you are planning an upgrade, consider how color impacts your organization. A template can feature a red “Priority” box and a green “Finance” column. To understand how these layouts perform across different hardware, explore our Best E Ink Tablet 2025 guide, which details how hardware handles complex PDFs.
Mastering how to make kindle scribe templates empowers you to build the exact productivity system your brain requires. By strictly adhering to the 1860 x 2480 resolution, utilizing scalable vector graphics, and implementing non-linear hyperlinked navigation, you elevate the tablet from a simple reader to a powerhouse dashboard. Just remember to always route your final flattened PDF through the “Send to Kindle” portal to ensure the proprietary handwriting layer is activated.
Don’t have 40 hours to spend learning Adobe InDesign? Instantly deploy an elite organizational system with our Ultimate Template Bundle, featuring thousands of pre-coded hyperlinks and 300 PPI resolution-matched perfection.
Download the Professional Bundle
3 Responses